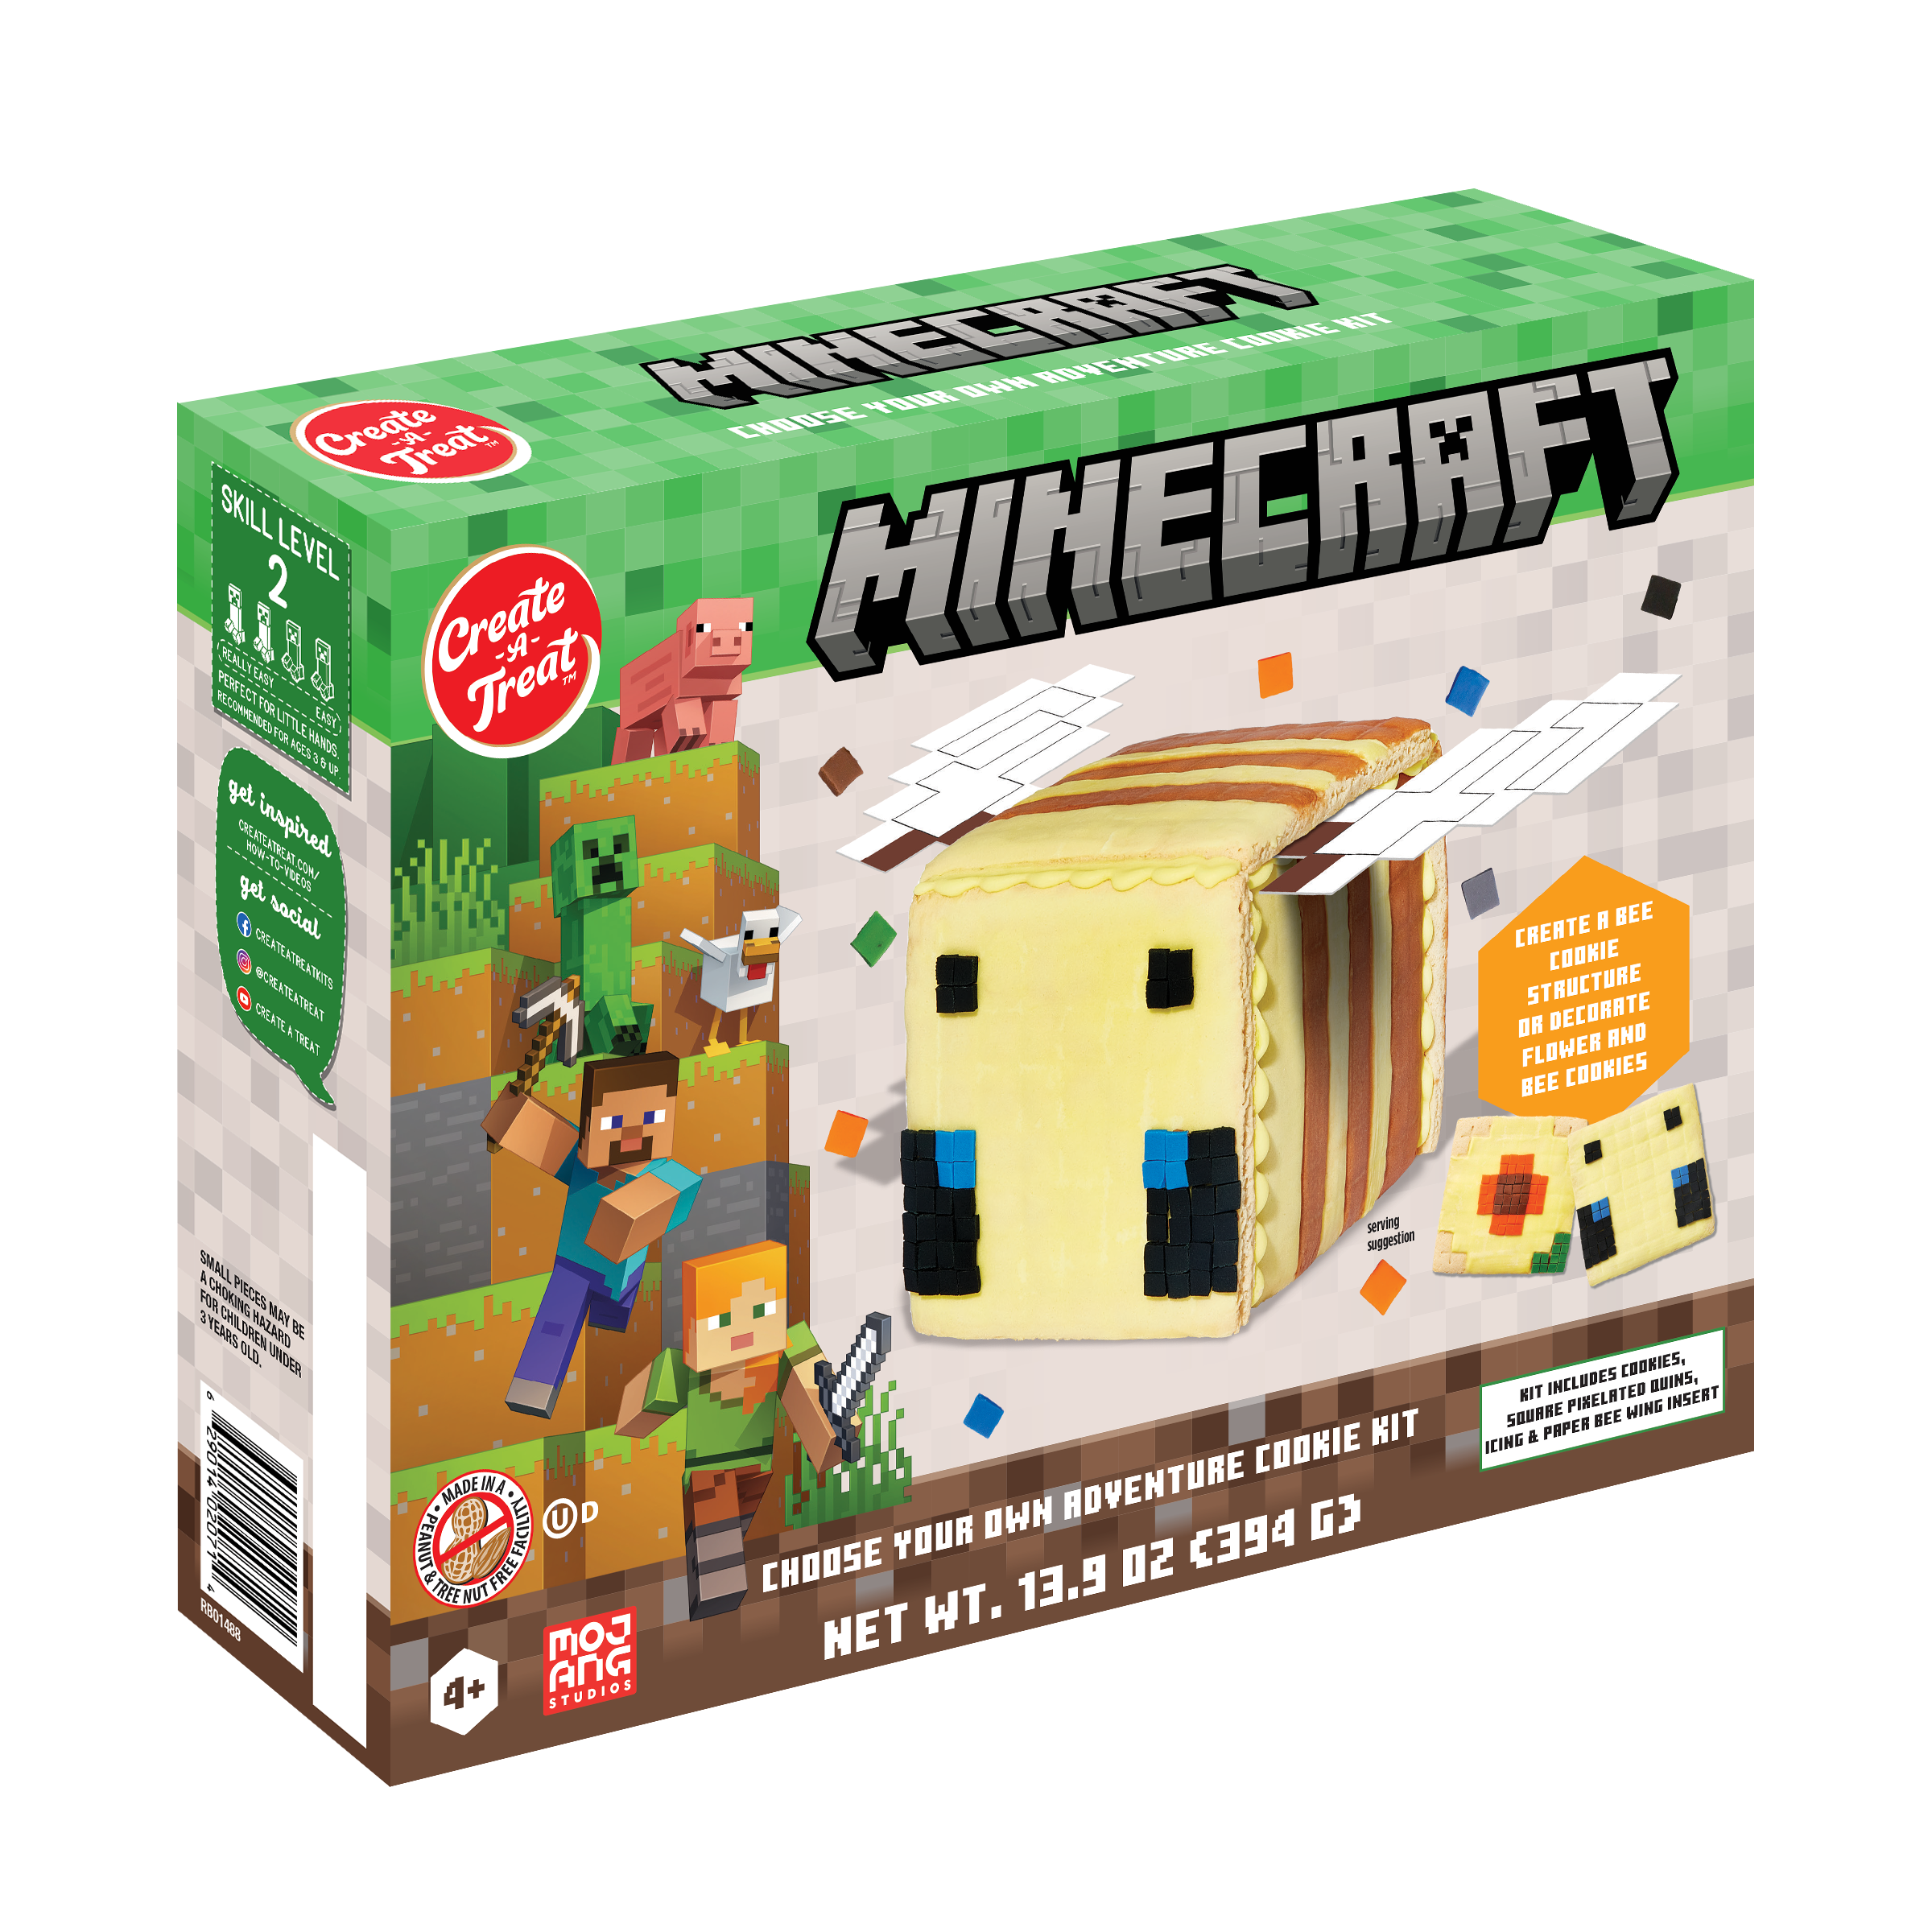
Minecraft Adventure Cookie Kit

This Product Contains

Pre-baked Cookies

Pre-Made Icing

Assortment of candies

Step-By-Step

Step 1: Icing Pouch Preparation

Knead the icing pouch for 1-2 minutes bringing icing to room temperature and making it more adhesive. To start the flow of icing, remove the cap snip 1/4 from the top of the tip. Be sure not to cut the opening too large. Your icing is now ready to use.

Step 2: Icing Pouch Preparation

Knead the icing pouch for 1-2 minutes bringing icing to room temperature and making it more adhesive. Cut a small opening at a corner and gently squeeze.

Step 3: Wings

For the structure, carefully pop out the perforated paper wings, and gently bend along the fold line.

Step 4: Apply icing

Lay bee cookies on the table with 2 lying face down (these will become your front and back). To ensure there is enough icing to stick the pieces, pipe a zigzag of icing along the edges of the front and back cookies.

Step 5: Assemble

Place back cookie onto the pad, then press side cookie up against icing on back panel. Repeat process with second side cookie, then front cookie. Adjust to create a good square prior to putting on top cookie.

Step 6: Add Wings

Pipe a zigzag of icing along the top edge of structure, then place wings with the folded inside piece inside the structure, and the wings pointing out, as shown.

Step 7: Add Top piece

Attach top cookie piece. Wait 15 minutes for icing to set prior to decorating your bee.

Step 8: Decorate

You are now ready to decorate your bee!

Note: Using candy and icing, create your own bee or flower, or create your very own by following steps 1, 2 and 8.

Minecraft Pixelated Cookie Kit

This Product Contains

Pre-baked Cookies

Pre-Made Icing

Assortment of candies

Step-By-Step

Step 1: Icing Pouch Preparation

Knead/massage the icing pouch for 1-2 minutes bringing icing to room temperature and making it more adhesive. Cutting the icing: Cut a small opening and gently squeeze.

Step 2: Icing Writer Preparation

Carefully cut the end of the writer, as shown.

Minecraft Pyramid House Kit

This Product Contains

Pre-baked Cookies

Pre-Made Icing

Assortment of candies

Step-By-Step

Step 1: Icing Pouch Preparation

Knead the icing pouch for 1-2 minutes bringing icing to room temperature and making it more adhesive. To start the flow of icing, remove the cap snip 1/4 from the top of the tip. Be sure not to cut the opening too large. Your icing is now ready to use.

Step 2: Arrange House Pieces for Assembly

Lay out the house pieces on the table with the front and back panels face down. To ensure there is enough icing to stick the pieces, pipe a zigzag of icing along the edges of the front and back panel as shown. Cardboard pad containing house cookies may be used as a base for setting up your house.

Step 3: Erect Walls

Place back panel of house onto the pad. Then press the side wall up against the icing strip on back panel. Repeat this process with the second side wall. Then front panel. Adjust walls to create a good rectangle prior to putting on roof pieces.

Step 4: Add Roof

Pipe a zigzag of icing along the top edge of your house. Then attach largest roof piece. Pipe a dot of icing to center of largest roof piece. Then attach medium roof piece. Repeat process with smallest roof piece. Wait 15 minutes prior to decorating your house.

Step 5: Icing Writer Preparation

Carefully cut the end of the writer, as shown.

Step 6: Decorate

You are now ready to decorate your house!

Barbie™ Glam Bag Cookie Kit

This Product Contains

Pre-baked Cookies

Pre-Made Icing

Assortment of candies

Step-By-Step

Step 1: ICING PREPARATION:

Remove pre-made icing from kit. Knead / massage the icing pouch for 1-2 minutes bringing icing to room temperature and making it more adhesive. CUTTING THE OPENING: Cut a small opening at a corner and gently squeeze.

Step 2: ARRANGE PIECES FOR ASSEMBLY:

Separate the cookie pieces by gently breaking along the snap lines between sections. Lay out pieces on the table with the front and back panels face down. Pipe a zigzag of icing along the edges of the front, back and base panels as shown.

Step 3: ASSEMBLE GLAM BAG:

Place back panel of Glam Bag on the table, then press base piece against icing on back panel. Attach side pieces a shown. Attach front panel and hold in place for one minute while icing sets. Wait 15 minutes prior to decorating your Glam Bag.

Step 4: ICING WRITER PREPARATION:

Carefully cut the end of the writer, as shown.

Step 5: DECORATE:

You are now ready to decorate your Glam Bag!

Harry Potter Hogwarts™ Castle Cookie Kit

This Product Contains

Pre-baked Cookies

Pre-Made Icing

Assortment of candies

Step-By-Step

Step 1: Icing Pouch Preparation

Knead/massage the icing pouch for 1-2 minutes bringing icing to room temperature and making it more adhesive. Cutting the icing tip: Remove cap and snip the tip 1/4″ from the end. Your icing is now ready to use with your cookie kit.

Step 2: Icing Pouch Preparation

Knead the icing pouch for 1-2 minutes bringing icing to room temperature and making it more adhesive. Cut a small opening at a corner and gently squeeze.

Step 3: Icing Writer Preparation

Carefully cut the end of the writer, as shown.

Step 4: Separate Pieces

Separate cookie pieces by gently breaking along the snap lines between sections. Separate the stand from the bottom of your character cookies by gently breaking along the snap lines.

Step 5: Decorate

Decorate your castle and character cookies as desired with icing and candy. Allow to dry thoroughly before assembling.

Step 6: Apply Icing

Place the break walls face down and pipe a zigzag of icing along the bottom edges. Add icing on the face of the bridge and spacers as shown.

Step 7: Attach Spacers

Attach spacers to the back of the break walls as shown. Place the bridge upright in the middle of the pad, and attach break wall A as shown. Repeat with break wall B.

Step 8: Attach Castle Pieces

Pipe a zigzag of icing along the bottom edge of the castle pieces. Add icing to the back of the bridge and spacer pieces as shown. Carefully press one castle piece against the icing on the bridge and spacer, and hold in place for 1 minute. Repeat with remaining castle piece.

Step 9: Attach Stand

Pipe a zigzag of icing along the edge of each stand. Holding your character upright attach the stand, as shown.

Barbie™ Cookie Dreamhouse™ Cookie Kit

This Product Contains

Pre-baked Cookies

Pre-Made Icing

Assortment of candies

Step-By-Step

Step 1: ICING POUCH PREPARATION:

Remove pre-made icing from kit. Knead / massage the icing pouch for 1-2 minutes bringing icing to room temperature and making it more adhesive CUTTING THE TIP: Remove cap and snip the tip 1/4″ from the end. Your icing is now ready for assembling the house using your cookie kit.

Step 2: ICING WRITER PREPARATION:

Carefully cut the end of the writer, as shown.

Step 3: ARRANGE HOUSE PIECES FOR ASSEMBLY:

Lay out house pieces on the table with the front and back panels face down. Separate the house pieces by gently breaking along the lines between sections. To ensure there is enough icing to stick the pieces, pipe a zigzag of icing along the edges, as shown.

Step 4: ERECTING WALLS OF HOUSE:

Place back panel of the house onto the pad, then press a side wall up against it. Repeat process with second side wall and front panel. Adjust walls to create a good rectangle.

Step 5: APPLY ICING TO HOUSE PEAKS:

Pipe a zigzag of icing along the roof edges of front and back panels.

Step 6: ADD ROOF:

Attach small lower roof panel to house peaks and hold in place for one minute. Attach larger upper roof panel to house peaks and hold in place for one minute. Wait for 15 minutes prior to decorating the house.

Step 7: READY TO DECORATE:

You are now ready to decorate your house!

OREO® Pre-Built Cookie House Kit

Step-By-Step

Step 1: ICING POUCH PREPARATION

Knead the icing pouch for 1-2 minutes bringing icing to room temperature and making it more adhesive. To start the flow of icing, remove the cap and snip the tip 1⁄4″ from the top of the tip. Be sure not to cut the opening too large. Your icing is now ready to use.

Step 2: ICING WRITER PREPARATION

Carefully cut the end of the writer, as shown.

Step 3: DECORATE

You are now ready to decorate your house! To create roof tiles, twist open OREO cookies and use wafers as tiles. Gently break each cookie piece in half and attach to roof with icing. Continue decorating as desired.

OREO® E-Z Build® Cookie Train Kit

Step-By-Step

Step 1: ICING POUCH PREPARATION

Knead the icing pouch for 1-2 minutes bringing icing to room temperature and making it more adhesive. To start the flow of icing, remove the cap and snip the tip 1⁄4″ from the top of the tip. Be sure not to cut the opening too large. Your icing is now ready to use.

Step 2: ARRANGE PIECES FOR ASSEMBLY

Your train kit includes cookie pieces to build two cars and an engine. Separate the train pieces by gently breaking along the snap lines between sections.

Step 3: BUILDING THE ENGINE

Line the cavity for the engine with icing. Place a dot of icing on the center of two OREO cookies. Sandwich three cookies together and place in the EZ Build® Tray. Put a strip of icing along the short edge of the “cow catcher” and attach it to the front of the train.

Step 4: ASSEMBLE THE ENGINE

Pipe a strip of icing halfway up the edge of the engine walls and attach them. Pipe a strip of icing halfway up the back edge of the walls and attach a rounded end piece. Pipe strips of icing along the top edges of the walls. Add the roof. Attach each of the two wheels with a dot of icing.

Step 5: BUILDING THE CARS

Lay four walls of the first car on the table. The sides have two dots marked on them. Pipe icing in the cavity for this car. Pipe a strip of icing on the back edges of the ends as shown.

Step 6: ASSEMBLE THE CARS

Place one end on the base and press the side walls up against it. Attach the other end. Repeat with second car using the sides with a swirl marked on them. Attach remaining OREO cookie to the end of the train.

Step 7: ICING WRITER PREPARATION

Carefully cut the end of the writer, as shown.

Step 8: DECORATE

You are now ready to decorate your train! Decorate remaining cookie pieces as presents and place inside the cars once complete.

Hot Wheels™ Cookie Garage Gingerbread Kit

Step-By-Step

Step 1: ICING PREPARATION:

Remove pre-made icing from kit. Knead / massage the icing pouch for 1-2 minutes bringing icing to room temperature and making it more adhesive. CUTTING THE TIP: Remove cap and snip the tip 1/4″ from the end. Your icing is now ready for assembling the garage.

Step 2: ARRANGE PIECES FOR ASSEMBLY:

Lay pieces out on the table. Separate the garage pieces by gently breaking along the snap lines between sections. Place front and back walls face down.

Step 3: PREPARE THE FRAME:

Put icing along the bottom and side edge of side wall as shown. Press the 2 short walls up against it. Repeat with other side of garage. Pipe a line of icing along the 4 short walls and place the two large front/back pieces on top, pressing them into the icing on the garage.

Step 4: APPLY ROOF TO GARAGE:

Pipe a thick line of icing along the top edges of all walls. Attach roof to garage and gently press in place. Let your garage dry for about 30 minutes before you decorate.

Step 5: ICING TUBE INSTRUCTIONS:

Carefully cut the end of the icing tube in small amounts, as shown above. Do not cut too large or you will lose detail when decorating.

Step 6: ICING POUCH PREPARATION:

Knead icing pouch to make icing easier to squeeze out. Cut a 1/4″ opening at corner of pouch and gently squeeze. You are now ready to decorate your garage!

OREO® Arctic Skating Rink Cookie Kit

Step-By-Step

Step 1: ICING POUCH PREPARATION

Knead the icing pouch for 1-2 minutes bringing icing to room temperature and making it more adhesive. To start the flow of icing, remove the cap and snip the tip 1⁄4″ from the top of the tip. Be sure not to cut the opening too large. Your icing is now ready to use.

Step 2: SEPARATE PIECES

Separate individual panels by gently breaking along snap lines.

Step 3: ICING WRITER PREPARATION

Carefully cut the end of the writer, as shown.

Step 4: DECORATE

Twist OREO cookie and attach the half with crème on the penguin cookie with icing. Decorate the rental shop, penguins and trees with icing, fondant and candy. Allow to dry.

Step 5: ATTACH STANDS

Attach stands behind the rental shop and penguins. Attach to desired base with icing.

Step 6: ATTACH TREES

Attach large trees to the stands of the rental shop, with the smaller trees in front, as shown. Continue decorating as desired.

Sour Patch Kids® Ultimate Ski Cookie Chalet Kit

Step-By-Step

Step 1: Icing Pouch Preparation

Knead the icing pouch for 1-2 minutes bringing icing to room temperature and making it more adhesive. To start the flow of icing, remove the cap and snip the tip 1⁄4″ from the top of the tip. Be sure not to cut the opening too large. Your icing is now ready to use.

Step 2: Pipe icing along embossed frame to form a base for chalet.

Step 3: Pipe icing on both edges of back panel and place onto base.

Lean roof piece against back panel and gently press into icing.

Step 4: Pipe icing on both edges of front panel and place onto base.

Press other roof gently into icing of front and back panels.

Step 5: Add a line of icing

Add a line of icing along center of roof to secure pieces together. Hold in place for 2 minutes.

Step 6: Icing Writer Preparation

Carefully cut the end of the writer, as shown.

Step 7: You are now ready to decorate your chalet!

Sour Patch Kids® Holiday Camper Kit

Step-By-Step

Step 1: Icing Pouch Preparation

Knead the icing pouch for 1-2 minutes bringing icing to room temperature and making it more adhesive. To start the flow of icing, remove the cap and snip the tip 1⁄4″ from the top of the tip. Be sure not to cut the opening too large. Your icing is now ready to use.

Step 2: Arrange Pieces for Assembly

Lay pieces out on the table with the front and back panels face down. Pipe a thick line of icing along the front and back panels as shown. Pipe a line of icing along the bottom edge of the two side pieces. Carboard tray containing components may be used as a base for setting up your camper.

Step 3: Assembling the Camper

Place the back panel of the camper onto the pad, then press a side wall up against the icing strip on the back panel. Repeat process with second side wall and then front panel.

Step 4: Add the Roof

Pipe a line of icing along the top edge of the side walls and add the roof panel. Hold in place for one minute. Wait 15 minutes prior to decorating your camper.

Step 5: Icing Writer Instructions

Carefully cut the end of the icing writer in small amounts, as shown. Do not cut too large or you will lose detail when decorating.

Step 6: Decorate

You are now ready to decorate your camper!

Barbie™ Cookie Dreamhouse™ Kit

Step-By-Step

Step 1: ICING PREPARATION:

Remove pre-made icing from kit. Knead / massage the icing pouch for 1-2 minutes bringing icing to room temperature and making it more adhesive CUTTING THE TIP: Remove cap and snip the tip 1/4″ from the end. Your icing is now ready for assembling the house.

Step 2: ARRANGE HOUSE PIECES FOR ASSEMBLY:

Lay pieces out on the table. Place front and back panels face down. Separate the house pieces by gently breaking along the snap lines between sections.

Step 3: PREPARE THE FRAME:

Pipe a thick line of icing on front, back and side panels as shown. Cardboard pad can be used to build your house on adding icing at the bottom of the panels.

Step 4: ERECTING WALLS OF HOUSE:

Place back panel of the house onto the base, then press a side wall up against it. Repeat process with second side wall and front panel. Adjust walls to create a good rectangle.

Step 5: APPLY ICING TO HOUSE PEAKS:

Pipe a thick line of icing along the roof edges of front and back panels.

Step 6: ADD ROOF:

Attach roof panels to house peaks and hold in place for one minute while icing sets.

Step 7: ASSEMBLE STAIRS:

Pipe icing on piece 4 and attach piece 2 and 3 and line them up as shown. You can use piece 1 as an additional step, or enjoy it as a tasty snack. Attach piece 5 and 6 to the sides as shown. Ice the stairs to the front of the house.

Step 8: ASSEMBLE FLOWER BOX:

Pipe icing on back side of piece 8 and attach to back of piece 7. Ice the flower box to the front of the house. Wait 30 minutes prior to decorating your house.

Step 9: ICING WRITER INSTRUCTIONS:

Carefully cut the end of the icing writer in small amounts, as shown above. Do not cut too large or you will lose detail when decorating.

Step 10: READY TO DECORATE:

You are now ready to decorate your house!

OREO® E-Z Build® Cookie House Kit

This Product Contains

Pre-Baked Cookies

Pre-Made Icing

Assortment of Candies

Step-By-Step

Step 1: ICING POUCH PREPARATION

Knead the icing pouch for 1-2 minutes bringing icing to room temperature and making it more adhesive. To start the flow of icing, remove the cap and snip the tip 1⁄4″ from the top of the tip. Be sure not to cut the opening too large. Your icing is now ready to use.

Step 2: ARRANGE HOUSE PIECES FOR ASSEMBLY:

Lay out house pieces on table with the front and back panels face down. Line the 4 canals of the E-Z Build® Tray with a strip of icing. Pipe a thick line of icing along the edges of the front and back panels as shown.

Step 3: ERECT WALLS:

Place back panel of house into the canal of E-Z Build® tray, then press side wall up against icing strip on back panel. Repeat process with second side wall and then front panel. Adjust walls to create a good rectangle prior to putting on roof pieces.

Step 4: APPLY ICING TO HOUSE PEAKS:

Pipe a thick strip of icing along roof edges of front and back panels. Add Roof: Attach roof panels to house peaks and hold in place for one minute. Add a strip of icing between roof pieces. Hold in place for another minute while icing sets. Wait 15 minutes prior to decorating your house.

Step 5: ICING WRITER PREPARATION

Carefully cut the end of the writer, as shown.

Step 6: DECORATE

You are now ready to decorate your house! To create roof tiles, twist open OREO cookies and use wafers as tiles. Attach cookie to roof with icing. Continue decorating as desired.

OREO® Mini Village Cookie Kit

This Product Contains

Pre-Baked Cookies

Pre-Made Icing

Assortment of Candies

Step-By-Step

Step 1: Icing Preparation

Knead/massage the icing pouch for 1-2 minutes bringing icing to room temperature and making it more adhesive. Cutting the icing tip: Remove cap and snip the tip 1/4″ from the end. Your icing is now ready for assembling the house.

Step 2: Arrange House Pieces for Assembly

Lay out house pieces on the table with the front and back panels face down. Separate the house pieces by gently breaking along the snap lines between sections. To ensure there is enough icing to stick the pieces, pipe a zigzag of icing along the edges of the front and back panels as shown.

Step 3: Erect Walls

Place back panel of house on base, then press side wall up against icing strip on back panel. Repeat process with second side wall, then front panel. Adjust walls to create a good rectangle prior to putting on roof pieces.

Step 4: Apply Icing to House Peaks

Pipe a zigzag of icing along roof edges of front and back panels.

Step 5: Add Roof

Attach roof panels to house peaks and hold in place for one minute. Add a zigzag of icing between roof pieces. Hold in place for another minute while icing sets. Wait 15 minutes prior to decorating your houses.

Step 6: Decorate

You are now ready to decorate your houses!

Build Your Own Christmas Gingerbread Cookie House Kit / Construye tu propia Casa Navidena

This Product Contains

Pre-Baked Cookies

Pre-Made Icing

Assortment of candies

Step-By-Step

Step 1: Icing Pouch Preparation

Knead/massage the icing pouch for 1-2 minutes bringing icing to room temperature and making it more adhesive. Cutting the icing tip: Remove cap and snip the tip 1/4″ from the end. Your icing is now ready to use.

Step 2: Arrange House Pieces for Assembly

Lay out house pieces on the table with the front and back panels face down. Separate the house pieces by gently breaking along the snap lines between sections.

Step 3: Apply Icing on Panels

To ensure there is enough icing to stick the pieces, pipe a zigzag of icing along the edges of the front, back and side panels as shown. Cardboard pad containing house cookies may be used as a base for setting up your house.

Step 4: Erect Walls

Place back panel of house onto the pad, then press side wall up against icing on back panel. Repeat process with second side wall, then front panel. Adjust walls to create a good rectangle prior to putting on roof pieces.

Step 5: Apply Icing to House Peaks

Pipe a zigzag of icing along roof edges. Attach roof panel to house and hold in place for one minute while icing sets.

Step 6: Add Entrance

Pipe a zigzag of icing along the edges of door panel and support panels as shown. Gently press support panels onto the front of the Casa, then attach door, as shown. Wait 15 minutes prior to decorating your house.

Step 7: Icing Writer Preparation

Carefully cut the end of the icing writer, as shown.

Step 8: Decorate

You are now ready to decorate your house!

Build Your Own Gingerbread Christmas Cookie Village Kit / Construye tu propio Pueblo Navideno de pan de Jengibre

This Product Contains

Pre-Baked Cookies

Pre-Made Icing

Assortment of candies

Step-By-Step

Step 1: Icing Pouch Preparation

Knead/massage the icing pouch for 1-2 minutes bringing icing to room temperature and making it more adhesive. Cutting the icing tip: Remove cap and snip the tip 1/4″ from the end. Be sure not to cut the opening too large. Your icing is now ready use.

Step 2: Arrange Church Pieces for Assembly

Lay out church pieces on table with the front and back panels face down. Separate the church pieces by gently breaking along the snap lines between sections.

Step 3: Apply Icing

To ensure there is enough icing to stick the pieces, pipe a zigzag of icing along the edges of the panels as shown. Cardboard pad containing church cookies may be used as a base for setting up your church.

Step 4: Erect Walls

Place back panel of church onto the pad, then press side wall up against icing on back panel. Place support piece perpendicular to side wall as shown. Repeat process with second side wall, then front panel. Adjust walls to create a good rectangle prior to putting on roof pieces.

Step 5: Apply Icing to Church Peaks

Pipe a zigzag of icing along roof edges of back and support panels.

Step 6: Add Roof

Attach roof panels to church peaks and hold in place for one minute. Add a zigzag of icing between roof pieces. Hold in place for another minute while icing sets.

Step 7: Attach Side House

Pipe a zigzag of icing to side house panels and assemble as shown. Pipe a zigzag of icing along the roof edges then attach roof panel to side house. Hold in place for one minute while the icing sets. Wait 15 minutes prior to decorating your church.

7 E-Z Steps Mini Village

Step 8: Arrange House Pieces for Assembly

Separate the 4 mini village houses into individual panels by gently breaking along the snap lines between sections.

Step 9: Tall Gabled House

Pipe a zigzag of icing along the top edges of both ‘a’ panels. Pipe a zigzag of icing along the sides of both ‘b’ panels. Assemble the house, as shown. Attach the entrance with icing.

Step 10: Short Gabled House

Pipe a zigzag of icing along the top edges of both ‘a’ panels. Pipe a zigzag of icing along the sides of both ‘b’ panels. Assemble the house, as shown.

Step 11: Tall Flat Roof House

Pipe a zigzag of icing along the top edges of both ‘a’ and ‘b’ panels. Pipe a zigzag of icing along the top and sides of both ‘c’ panels. Assemble the house, as shown.

Step 12: Short Flat Roof House

Pipe a zigzag of icing along the top edges of both ‘a’ and ‘b’ panels. Pipe a zigzag of icing along the top and sides of both ‘c’ panels. Assemble the house, as shown.

Step 13: Icing Writer Preparation

Carefully cut the end of the icing writer, as shown.

Step 14: Decorate

You are now ready to decorate your village!

CHIPS AHOY! E-Z Build® Chocolate Chip Cookie House Kit

This Product Contains

Pre-Baked Cookies

Pre-Made Icing & Building Tools

Assortment of Candies

Step-By-Step

Step 1: Icing Pouch Preparation

Knead/massage the icing pouch for 1-2 minutes bringing icing to room temperature and making it more adhesive. Cutting the icing tip: Remove cap and snip the tip 1/4″ from the end. Be sure not to cut the opening too large. Your icing is now ready to use.

Step 2: Arrange House Pieces for Assembly

Lay out house pieces on the table with the front and back panels face down. To ensure there is enough icing to stick the pieces, pipe a zigzag of icing along the edges of the front and back panels as shown. Line the 4 canals of E-Z Build® tray with a zigzag of icing.

Step 3: Erect Walls

Place back panel of house into the canal of the E-Z Build tray. Then press side wall up against icing strip on back panel. Repeat process with second side wall, then, front panel. Adjust walls to create a good rectangle prior to putting on roof pieces.

Step 4: Apply Icing to House Peaks

Pipe a zigzag strip of icing along roof edges of front and back panels.

Step 5: Add Roof

Attach roof panels to house peaks and hold in place for one minute. Add a zigzag of icing between roof pieces. Hold in place for another minute while icing sets. Wait 15 minutes prior to decorating the house.

Step 6: Decorate

You are now ready to decorate your house!

OREO® Spooky Castle Cookie Kit

This Product Contains

Pre-Baked Cookies

Pre-Made Icing

Assortment of Candies

Step-By-Step

Step 1: ICING POUCH PREPARATION:

Remove pre-made icing from kit. Knead / massage the icing pouch for 1-2 minutes bringing icing to room temperature and making it more adhesive. CUTTING THE TIP: Remove cap and snip the tip 1/4″ from the end. Be sure not to cut the opening too large. Your icing is now ready to use.

Step 2: SEPARATE PIECES:

Separate individual panels by gently breaking along snap lines.

Step 3: ICING WRITER PREPARATION:

Carefully cut the end of the writer, as shown.

Step 4: DECORATE:

Decorate the castle, tree and fountain with OREO cookies, icing and candy. Allow to dry.

Step 5: ATTACH STANDS:

Pipe a zigzag of icing along the edge of stands D and E. Attach to the tree and fountain as shown.

Step 6: ATTACH STANDS:

Pipe a zigzag of icing along the edge and bottom of remaining stands and attach to castle piece, as shown. Attach the two side towers to stands B and C with icing.

Step 7: ATTACH TOWERS:

Attach remaining tower to Stand A with icing, as shown.

Continue decorating as desired.

REESE’S E-Z Build Chocolate Cookie Halloween House Kit

This Product Contains

Pre-Baked Cookies

Pre-Made Icing & Building Tools

Assortment of Candies

Step-By-Step

Step 1: ICING PREPARATION:

Remove pre-made icing from kit. Knead / massage the icing pouch for 1-2 minutes bringing icing to room temperature and making it more adhesive. CUTTING THE TIP: Remove cap and snip the tip 1/4″ from the end. Your icing is now ready to use.

Step 2: ARRANGE HOUSE PIECES FOR ASSEMBLY:

Lay out house pieces out on the table with the front and back panels face down. To ensure there is enough icing to stick the pieces. Pipe a zigzag of icing along the edges of the front and back panels as shown. Line the 4 canals of the E-Z build tray with a zigzag of icing.

Step 3: ERECTING THE WALLS:

Place back panel of house into the canal of the E-Z Build tray then press side wall up against icing strip on back panel. Repeat process with second side wall and then the front panel. Adjust walls to create a good rectangle prior to putting on roof pieces.

Step 4: APPLY ICING TO HOUSE PEAKS:

Pipe a zigzag of icing along roof edges of front and back panels.

Step 5: ADD ROOF:

Attach roof panels to house peaks and hold in place for one minute. Add a zigzag of icing between roof pieces. Hold in place for another minute while icing sets. Wait 15 minutes prior to decorating your house.

Step 6: ICING POUCH PREPARATION:

Knead the icing pouch for 1-2 minutes bringing icing to room temperature and making it more adhesive. Cut a small opening at a corner and gently squeeze.

Step 7: DECORATE:

You are now ready to decorate your house!